
Tired of launching features in your SaaS that end up gathering dust like a bread maker bought on a whim? Welcome to the club. UX design workshops are the antidote. We bring together your teams (those bright-spark creatives) and your users (customers... sometimes a little too honest) to finally deliver a useful product. In this article, we'll explain how to organize these joyful creative sessions without losing your sanity, and above all, how to turn user feedback into solid gold. Get ready: we're about to co-design, and this time, it won't end up in the basement.
Table of contents
Why Conduct SaaS Co-Design Workshops?
Your users sign up with enthusiasm, explore your SaaS with curiosity... and then, nothing. A deafening radio silence. The churn rate skyrockets, and you wonder if your product is cursed.
You reassure yourself by saying, "It's the competition's fault, they have more bling-bling features!" or "The market isn't ready for our revolutionary solution yet!" But let's be honest, the truth is often simpler: your product doesn't really meet your users' needs.
Yes, it stings. We all tend to overestimate the value of what we've created, to believe that our SaaS is the most beautiful, the most intelligent, the most... everything. But users are pragmatic. If your product doesn't solve a real problem in an effective and enjoyable way, they'll look elsewhere.
So, how do you get out of this vicious cycle of disengagement? How do you turn your ghost users into loyal and enthusiastic customers? The answer: design workshops.
They can help you to:
- Understand the reasons for disengagement: What are the friction points? What unmet needs exist? What prevents users from investing in your product?
- Identify opportunities for improvement: What features should be added or modified? How can you make the user experience more seamless and enjoyable?
- Validate your assumptions: Are your ideas actually relevant? Do they meet users' needs? Are they easy to understand and use?
In other words, design workshops allow you to step out of your ivory tower and connect with the reality on the ground. To see your SaaS through your users' eyes and to understand what motivates them (or not).
Think it's too good to be true? That design workshops are only for large companies with unlimited budgets? Think again. There are workshops suited to all sizes and budgets.
What are the different types of UX workshops and how to choose the right one?
There are many types of design workshops, each with its own goals, methods, and benefits. The challenge is to choose the one that best suits your needs.
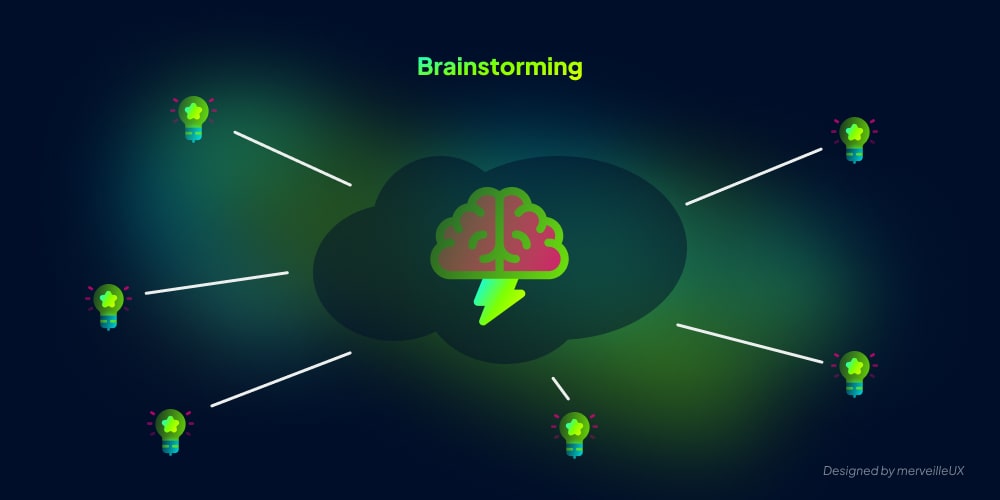
1. Brainstorming
Ah, brainstorming! The easiest workshop to organize (in theory) and the hardest to master (in practice). The principle is simple: you gather a few people, ask them a question (e.g., "How can we improve the onboarding of our new users?"), and let them pour out their ideas, without censorship or criticism.
The advantage: it's quick, it's fun (well, it can be), and it allows you to generate a large number of ideas, even the most outlandish.
The disadvantage: it's often a joyful mess. You need an experienced facilitator to channel the energy, avoid digressions, and ensure that everyone has the opportunity to express themselves.
When to use it: at the beginning of a project, to explore different avenues of solutions. Or when you feel stuck and need a creative boost.
SaaS Example: You notice that your users' activation rate is low. Organize a brainstorming session to find ideas to make onboarding simpler, more intuitive, and more engaging.
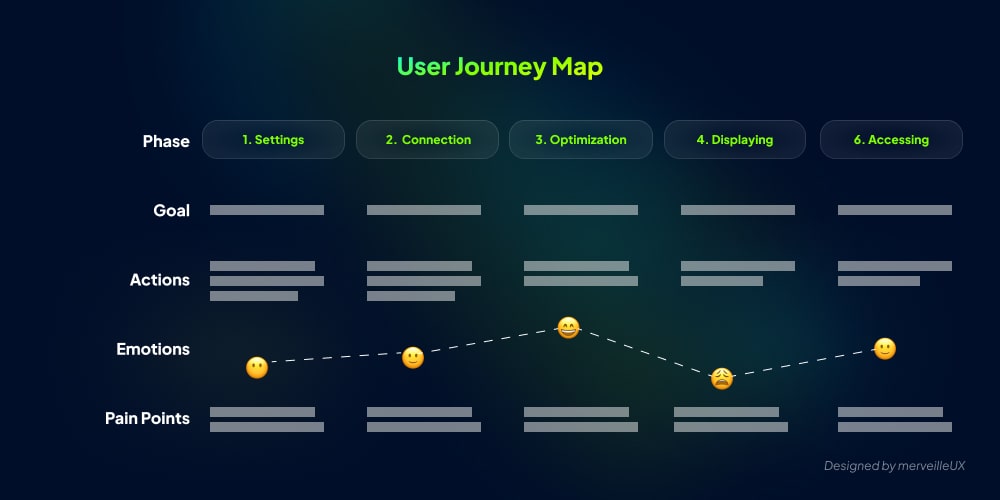
2. User Journey Mapping
User Journey Mapping involves visualizing your users' journey, from their first interaction with your SaaS to the realization of their goals (or to their abandonment, which happens more often than we'd like).
The advantage: it allows you to understand the user experience from start to finish, to identify the friction points (the moments where users feel frustrated or lost), and to find opportunities for improvement.
The disadvantage: it can be long and tedious. You have to interview users, collect data, analyze the results... In short, it takes time and organization.
When to use it: when you want to understand why your users abandon your product, when you want to improve the overall user experience, when you want to optimize the customer journey.
SaaS Example: You notice that many users abandon their cart before completing their purchase. Organize a User Journey Mapping to analyze the purchase journey and identify the roadblocks.
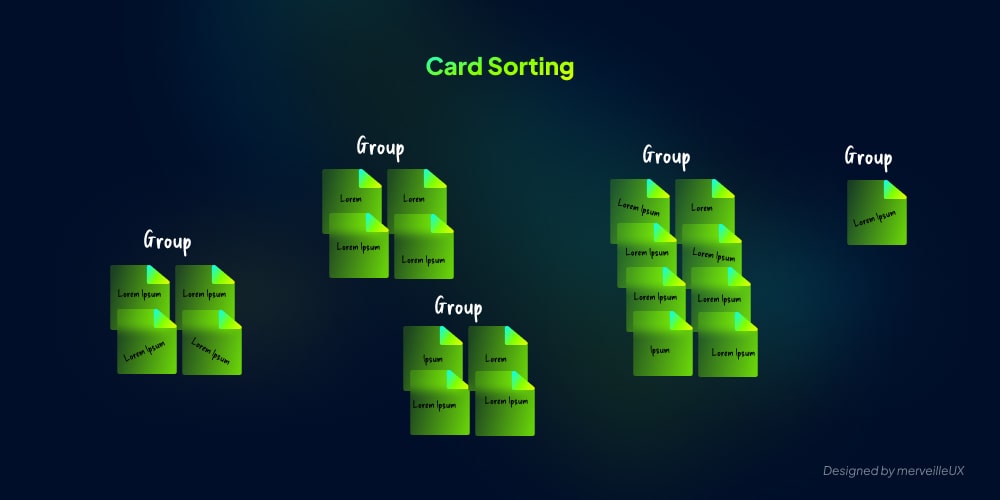
3. Card Sorting
Card sorting is a simple and effective technique to understand how your participants perceive and organize information. It consists of asking them to sort cards containing information elements (e.g., features, categories, content) according to their affinities.
The advantage: It's simple to implement, it's inexpensive, and it gives you valuable information about how your users perceive and organize information.
The disadvantage: It can be tedious for participants, and the results are not always easy to interpret. You need a minimum of data analysis skills to draw meaningful conclusions.
When to use it: When you want to improve the navigation of your SaaS, when you want to optimize the organization of content, when you want to create a clear and intuitive tree structure.
SaaS Example: You notice that your users are having trouble finding the information they're looking for. Organize a Card Sorting to reorganize your navigation menu and make the information more accessible.
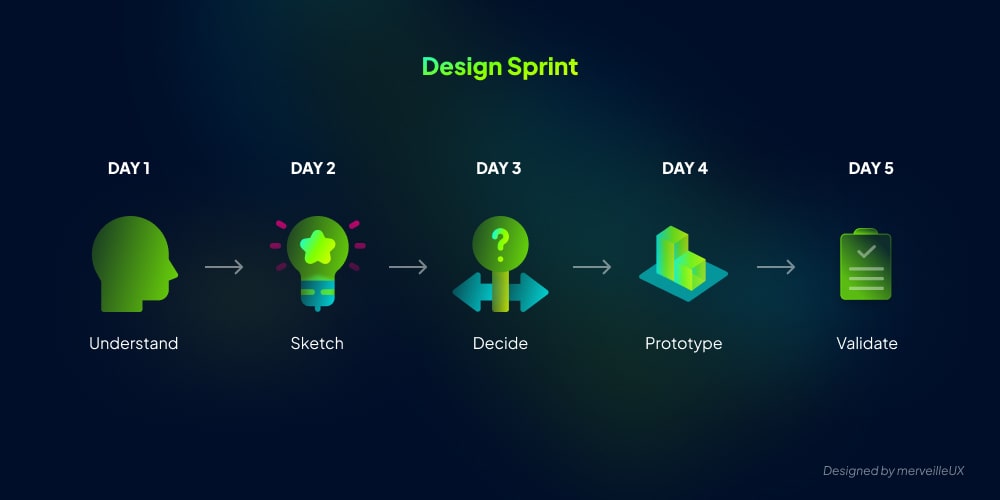
4. The Design Sprint
The Design Sprint is a bit like a creative marathon. For 5 days, you put your team in commando mode and focus on a single goal: quickly prototype and test a solution to a specific problem.
The advantage: It allows you to quickly validate your ideas, reduce risks, and promote collaboration. In 5 days, you go from idea to prototype tested in real conditions.
The disadvantage: It's intense, it's demanding, and it requires total commitment from the team. You have to be prepared to put aside your usual projects and focus 100% on the workshop.
When to use it: When you want to launch a new feature, when you want to solve a complex problem, when you want to validate a new product idea.
SaaS Example: You have an idea for a revolutionary new feature, but you're not sure if your users will like it. Organize a Design Sprint to prototype the feature and test it with a panel of target users.
How to organize a successful UX co-design workshop?
You've chosen your workshop? Excellent. Now, the essential question: how to turn this initiative into a concrete lever for improving your SaaS, rather than just an unproductive meeting? Organizing a successful UX co-design workshop requires rigorous preparation.
1. Clearly define objectives
A workshop without clearly defined objectives risks turning into an informal discussion, which may be pleasant, but unproductive. You may waste time, energy, and not achieve the desired results. To avoid this problem, you must define SMART objectives: Specific, Measurable, Achievable, Relevant, Time-bound.
Let's break down each element:
- Specific: the objective must be clear, precise, and concise. Avoid vague and general formulations. For example, instead of saying "improve user experience," prefer "identify 3 major friction points in the new user signup process."
- Measurable: the objective must be quantifiable, meaning that you must be able to measure its achievement. For example, "increase the conversion rate of the homepage by 10%" is a measurable objective.
- Achievable: the objective must be realistic and achievable, given your resources and constraints. Don't set goals that are too ambitious that may discourage your team.
- Relevant: the objective must be relevant to your overall strategy and priorities. It should contribute to the achievement of your business goals.
- Time-bound: the objective must have a clear deadline. For example, "launch a new version of the mobile app by the end of the quarter."
SMART Objective Example: "Identify 3 major friction points in the new user signup process by the end of the workshop, to reduce the abandonment rate by 15% over the next month."
- Specific: identify friction points in the signup process.
- Measurable: reduce the abandonment rate by 15%.
- Achievable: a realistic goal given available resources.
- Relevant: improving signup contributes to acquiring new customers.
- Time-bound: the workshop must achieve its objective before the end of the session, and the impact must be measurable in the next month.
2. Choose the right participants
The choice of participants is essential, as it will have a direct impact on the quality of discussions, the richness of ideas, and the relevance of the results.
Indeed, a workshop composed solely of technical experts risks lacking user perspective, while a workshop composed solely of users risks lacking technical realism. The ideal is therefore to bring together a diversified group, composed of people with skills, experiences, and different points of view.
The two main categories of participants to consider are:
- The internal team: These are the people who work daily on your SaaS and who are well aware of its features, strengths, and weaknesses.
- The users: These are the people who use your SaaS daily and who have direct experience of its advantages and disadvantages.
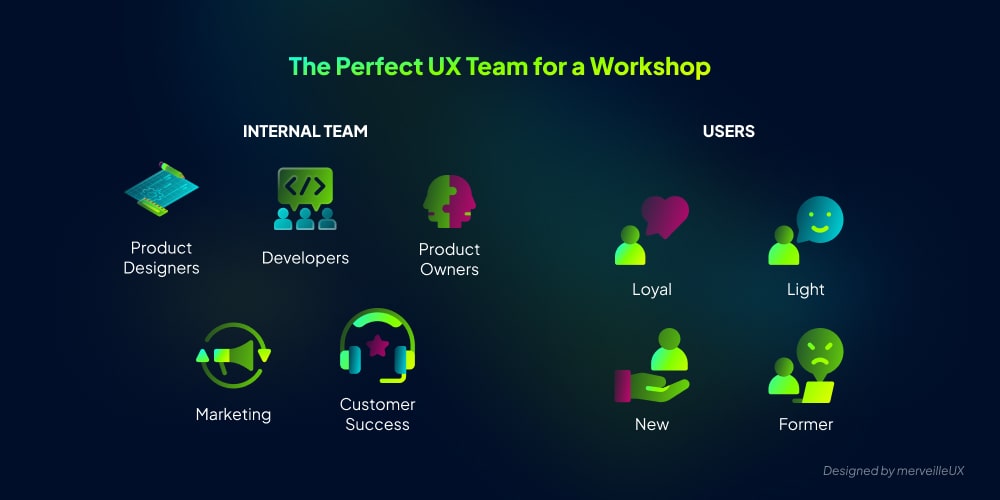
1. The internal team:
- UX/Product Designers: they are the experts in user experience and can bring their expertise in ergonomics, interface, and accessibility.
- Product Owners: they are responsible for the product vision and can ensure that the proposed solutions are aligned with the overall strategy.
- Developers: they are the technical experts and can bring their expertise in feasibility and technical constraints.
- Marketers: they are the experts in the market and customer needs and can bring their expertise in positioning, communication, and sales.
- Support Client: they are in direct contact with users and can bring their knowledge of the problems and frustrations they encounter.
Tip: Prioritize a multidisciplinary internal team, composed of people with complementary skills and experiences. Avoid over-representing a single team or a single function.
2. The users:
- Loyal customers: they are familiar with your SaaS and can provide feedback on existing features and improvements to be made.
- New users: they can bring a fresh and objective look at the onboarding experience and identify potential friction points.
- Casual users: they can provide feedback on the features they use the least and identify the reasons for their low usage.
- Former users: they can provide their testimony on the reasons for their departure and identify avenues for improvement to win back lost customers.
Tips for recruiting the right users:
- Define selection criteria: What are the user profiles that are most likely to provide you with relevant feedback? (e.g., level of expertise, type of product use, industry, etc.)
- Use different recruitment channels: email, social media, forums, online communities, etc.
- Write a clear and attractive invitation: clearly explain the objectives of the workshop, the benefits of their participation, and the time required.
- Offer an incentive: discount on subscription, free access to premium features, gift certificate, etc.
⚠️ Some rules to follow when composing an effective group of participants
- Prefer a limited number of participants: a group that is too large may be difficult to manage and facilitate. The ideal is not to exceed 8 to 10 people.
- Ensure the motivation of the participants: there is no point in inviting people who are not interested or who are not willing to invest.
- Communicate the objectives of the workshop clearly: explain to participants what you expect from them and how their contribution will be used.
3. Prepare the materials
Once your objectives have been defined and your participants selected, it's time to think about the materials needed to ensure the smooth running of your co-design workshop. A meticulous preparation of the materials will allow you to avoid unforeseen events and create an environment conducive to creativity and collaboration.
The materials to be provided can be divided into two broad categories: physical materials and digital materials.
1. Physical Materials:
- Post-it notes: in all colors and sizes! Post-it notes are essential for generating ideas, brainstorming, and organizing information.
- Markers: in different colors and thicknesses. Choose quality markers that don't bleed and are pleasant to use.
- Whiteboard or paperboard: to visualize ideas, create diagrams, and facilitate discussions. Make sure you have enough space to write and draw.
- Paper sheets: for sketches, notes, and individual exercises. Provide sheets of different sizes and colors.
- Masking tape: for attaching post-it notes, sheets of paper, and other elements to the whiteboard or paperboard.
- Pens and pencils: so participants can take notes and draw.
- Scissors and glue: useful for cutting and assembling visual elements.
- Rapid prototyping materials (optional): paper, cardboard, scissors, glue, felt-tip pens, etc. To allow participants to create physical mockups of their ideas.
Tips
- Always provide more materials than necessary. It's better to have too many post-it notes than not enough!
- Choose quality materials that are pleasant to use and visually appealing. This will help create a positive and stimulating atmosphere.
2. Digital Materials:
- Online collaboration tool: Miro, Mural, FigJam, etc. These tools allow you to collaborate remotely, share ideas, create virtual whiteboards, and facilitate communication.
- Prototyping tool: Figma, Sketch, Adobe XD, etc. These tools allow you to create interactive mockups of your ideas and test them with users.
- Presentation tool: PowerPoint, Keynote, Google Slides, etc. To present the objectives of the workshop, the results of the exercises, and the next steps.
- Video conferencing software: Zoom, Google Meet, Microsoft Teams, etc. Essential if the workshop is held remotely or if some participants cannot be physically present.
- Computer or tablet: for each participant, so that they can access digital tools and collaborate online.
- Reliable internet connection: essential for using digital tools and ensuring smooth communication.
- Speakers and microphone: for clear and audible communication during discussions.
Tips
- Test all digital tools before the workshop to make sure they are working properly and that all participants know how to use them.
- Provide a backup solution in case of a technical problem (e.g., a printed presentation, a plan B for communication).
- If the workshop is held remotely, send participants a user guide for the digital tools a few days before the event.
3. Other elements not to be neglected:
- A suitable workspace: a bright, spacious, comfortable room equipped with a reliable internet connection.
- Comfortable chairs: so participants can stay focused for several hours.
- A sufficiently large table: So that all participants can work comfortably and have access to the materials.
- Water, coffee, tea, and snacks: to maintain the energy and motivation of the participants.
- A timer: to respect the timing of the workshop.
- A camera: to document the results of the workshop (photos of whiteboards, post-it notes, participants, etc.). A smartphone will do the trick.
4. Structure and Facilitate the Workshop
The structure of a co-design workshop can vary depending on your objectives, budget, and resources. However, there is a basic structure that you can adapt to your specific needs.
1. Introduction (15-30 minutes):
- Welcome and presentation: warmly welcome the participants, thank them for their participation, and introduce yourself briefly.
- Presentation of objectives: clearly reiterate the objectives of the workshop and explain how their participation will contribute to achieving them.
- Presentation of the agenda: explain the course of the workshop, the different activities planned, and the time allotted to each.
- Presentation of the rules of the game: define the basic rules to ensure a respectful, collaborative, and productive working environment (e.g., active listening, respect for opinions, right to make mistakes, no negative criticism, etc.).
Tip: a clear and concise introduction is essential to make participants feel comfortable, inform them of the objectives and rules, and motivate them to get actively involved.
2. Research and Ideation Phase (1-2 hours):
- Presentation of the problem or challenge: clearly present the problem or challenge that you want to solve during the workshop.
- Research: ask participants to share their knowledge, experiences, and views on the problem or challenge (e.g., brainstorming, interviews, case studies, etc.).
- Ideation: encourage participants to generate as many ideas as possible to solve the problem or challenge (e.g., brainstorming, mind mapping, SCAMPER, etc.).
- Selection of ideas: select the most promising ideas based on their relevance, feasibility, and potential impact.
Tip: encourage diversity of views and foster creativity. Don't hesitate to use facilitation techniques to stimulate
the generation of ideas and to prevent creative block.
3. Prototyping Phase (1-2 hours):
- Selection of ideas to prototype: choose the most promising ideas to prototype based on their potential impact and feasibility.
- Creation of prototypes: ask participants to create prototypes (low or high fidelity) of the selected ideas (e.g., paper mockups, wireframes, interactive prototypes, etc.).
- Presentation of prototypes: ask participants to present their prototypes and explain how they work.
Tip: prioritize rapid and iterative prototyping. The goal is not to create perfect prototypes, but to quickly validate ideas and gather feedback.
4. Testing and Feedback Phase (30-60 minutes):
- User tests: ask participants to test the prototypes and provide their feedback.
- Feedback collection: collect participants' feedback in a structured and organized manner (e.g., questionnaires, interviews, observations, etc.).
- Feedback analysis: analyze participants' feedback to identify the strengths and weaknesses of the prototypes and to determine what improvements to make.
Tip: pay attention to user feedback and use it to improve your prototypes. Don't hesitate to iterate on your prototypes based on the feedback received.
5. Synthesis and Prioritization Phase (30-60 minutes):
- Synthesis of results: synthesize the results of the workshop and identify the most promising solutions.
- Prioritization of actions: define the actions to be implemented as a priority based on their relevance, feasibility, and impact.
- Definition of next steps: define the next steps to be taken to implement the priority actions.
Tip: Involve participants in synthesizing results and prioritizing actions. This will strengthen their commitment and ensure that the actions implemented are aligned with their needs and expectations.
6. Conclusion (15-30 minutes):
- Acknowledgments: warmly thank participants for their participation and contribution.
- Summary of results: summarize the main results of the workshop and the next steps to be taken.
- Feedback: ask participants to give their feedback on the workshop.
- Follow-up: explain how you intend to use the results of the workshop and how you will communicate the progress made.
Tip: A positive and motivating conclusion is essential to leave a good impression on participants and to encourage them to get involved in the next steps.
Conclusion
As you have understood, co-design workshops are a powerful tool for SaaS companies that want to create user-centered products, improve engagement, and drive growth. They require preparation, organization, and a good dose of empathy, but the results are worth it.
By following the tips and steps we have described in this article, you are now ready to organize your first co-design workshop and transform your users into true creative partners.
If you would like to be accompanied in this process, do not hesitate to call on our services. We offer tailor-made services for SaaS companies, ranging from defining objectives to facilitating workshops, including recruiting participants and synthesizing results. Our expertise in UX Design and our knowledge of the SaaS sector allow us to offer you solutions adapted to your specific needs and budgetary constraints.
Don't wait any longer to unlock the potential of your SaaS! Contact us today and discover how merveilleUX can help you create a product that your users love.